Tuesday, May 24, 2011

HoWL: Part 2-- Organize

Homeschooling with Littles: Part 2-- Organize!

Now that you have some items prepared, it's time to organize them all.

Why? Well, if you are like me, you may forget what's in all those bags, or you might be teaching your preschooler about the letter "c" and wonder if you have anything in your arsenal that you could use to assist or reinforce the topic taught. We also implement the "A place for everything and everything in its place" mentality in our home. That way you can find what you need right away and don't lose any precious school time. Organization is KEY to this system.
Here are some organizational ideas that I have found to be very useful in our home.

1. Keep things close to your school area-

I keep all my preschool items within arms reach of the school area. I have an organizing shelf that is strictly preschool friendly. I keep toddler friendly books in a basket next to the shelf. Teach your child where the "home" is for each item, have the child put away that item after they are done, and monitor them for the first couple of weeks to maintain the "place for everything and everything in its place". After a few weeks, your child will automatically (in theory) put away the item when they are done, in the correct "home", with little to no reminding on your part. I keep this organizing as uncomplicated as possible and as easily accessible as possible.

I keep my extra empty boxes a little bit higher on a bookshelf, out of toddler-hand reach. I do this because I can get these out when all other activities fail. I don't use them often, so when they come down, it is a special time. Each container can be used in different ways. A few boxes I have taped shut and cut a small opening in, so they can place small items inside, others have flaps or doors cut in. Egg cartons make great sorters.

I keep my activity bags in the shelving unit also, stored in two easy to slide out bins. One bin holds bags that we are currently working on, that incorporate with lessons, or bags that my preschooler still has not mastered. The second bin I keep bags that he has mastered and still enjoys using.

When one of my older children has finished their lessons for the day, but is still in the school area, they can help mommy out by pulling activities out of the second bin and sitting on the floor with my toddler. They act as a fun playmate/teacher and both parties enjoy this time (including Mommy who can use this toddler-free time to work with another student at the table). I store any other bags that are no longer age appropriate in our attic until a younger sibling can enjoy them later.

2. Catalog your items--

I have the memory of a bowl of oatmeal. If I do not immediately jot something down (ideas, conversations, dates) it will whiz right out my brain, never to be thought of again. To keep me from forgetting what's in all those activity bags or what books I can use for my preschooler, I came up with a catalog system. Right now my "catalog" is a crude sheet of ruled paper, with a list of every activity bag, book, and manipulative that I can use with my preschooler. I numbered all of my bags, front and back with a permanent marker (if you look closely, you may be able to see some numbers at the top of the bags in the pictures above). On my list I wrote down the bag number, the "title" of the bag, and included my own list of icons that help me understand the purpose of the bag and for what age it is appropriate. I keep a "key" at the top of the paper so I can easily identify the icon or icons I wrote next to the bag title.

For example: #22 Foam Letter Sorters A // 2+
According to my "key" at the top, I can tell that it uses letters (A), is a matching activity (//), and is appropriate for ages 2 and up (2+). You can come up with any icons that you choose, just be sure to include a key so that you can actually decipher your catalog later.

When I store my activity bags, I try to keep them all upright in the bins, with the numbers visible. You don't have to store them in numerical order, but it might help in locating a bag that much easier.

I include preschool educational books (like ABC books or shapes and colors books) and wooden toys in the list as well. These don't have a number, but I included the book title and what it's purpose is, or a description of the wooden toy/manipulative.

This catalog can now be my quick reference guide when planning out my school day or making out my lesson plans. But that's a whole 'nother blog post!


For the next installment, I will continue on with organizing...Your SCHEDULE!

Sunday, May 22, 2011

A Recycled Wool Sweater Diaper Cover

I found the idea here.

It went together rather quickly (a little over an hour, but I also had to re-teach myself how to make a chain using a crocket hook. thank goodness for youtube). I made the indicated "large" size, which was 2o inches for each side and left 4 inches in the leg openings. The leg openings were a bit snug for my hefty legged 1 1/2 year old, but worked! I loved this and am looking for any other shrunken wool sweaters I might be able to procure from our local thrift store....I want to make lots more!

This sweater had a rather wide waist and extra long cuffs, which I think worked well for the over all look. I can imagine that each sweater used could make dramatically different covers in size and appearance.

I made this to use as an actual cloth diaper cover, as the wool is naturally leak resistant (once lanolized and all that jazz), but really this would be adorable as just some bottoms to wear any old day, over any ole diaper.


Friday, May 20, 2011

HoWL: Part 1-- Prepare

Homeschooling with Littles (aka: HoWL)

Part 1:
Prepare


When we sit down at the school table every morning, I like to have a handy supply nearby or already pulled out to entertain my youngest two. Your "supply" may be a stack of board books or a coloring book and crayons. And, although these are great staples to have on hand, little ones grow tired of these, or you are stuck reading the same book over and over and over again when you really should be instructing grammar or conducting a spelling test. To help out, here are some of the ideas we use in our house.


Make:

Most of you have seen or heard of Preschool Activities in a Bag. If you haven't, then I strongly suggest borrowing copies of their two books, or purchasing the e-books through their website. Once you get the general idea of filling a zip-close bag with little hands-on activities, you can expound from what they suggest and make variations of your own. Before you know it, you can have a HUGE supply on hand. I have made plenty, and have had friends pass theirs on to me when their older children grew too old for the activities. I have also found tons at used curriculum fairs, most of which were free or very very cheap. I have 58 bags in all!

I have also been a part of a few Preschool Activities in a Bag co-ops. Basically you and a few other moms share the load in making a large sum of activities and then separate the bounty out when your done. In turn you don't have to buy supplies for all 36 activities, but just for 12 or so. You can meet and assemble them together or just meet up to divide the bags out in the end. The website I gave above has a coordinator book that includes all the tips you need to host a successful swap/co-op.

Here are a few ideas for bag activities:

1. cut straws into 1, 2, 3, and 4 inch segments. place those and some colorful pipe cleaner/chenille stems in a bag. for the activity part, the child will push the pipe cleaners through the straw openings, placing as many on as possible. works on hand-eye coordination. suitable for 1.5 years and up. *possible choking hazard! use discretion.

2. save spent canning lids (not the rings for this), or save frozen juice can lids. decorate two with identical stickers. repeat with the other lids. you can use any stickers you have on hand. this will be a basic matching activity. you can use basic shapes and colors for younger children and numbers and letters for older children. you can also affix magnets to the backs so that they stick together as pairs or can be sorted on the refrigerator or other magnetic surface. suitable for 2 years and up.

3. cut shapes out of foam craft squares. use a hole punch to punch holes close, but not too close, along the edge of the shape. take a shoe string, and tying one knot at the end so that it will stay in place, show the child how to lace, or "sew" around the shape. to make them extra sturdy, if you want these to last through multiple children, glue two foam craft squares together before cutting them into a shape. suitable for 2 years and up.

4. pipe cleaners and cheerios, beads, or circular pasta. show the child how to place the pipe cleaner through the objects. work on patterns if you use colorful cheerios or beads. use discretion when choosing the object to place in the bag, beads and pasta can be choking hazards for babies and some toddlers. suitable for 1.5 years and up.

*I want to make this a regular segment on my blog, so be looking for bag activity posts in the future!

For littles who have not developed hand-eye dexterity, keep a supply of used cereal/cracker boxes, laundry detergent lids, empty oatmeal containers, etc. and let them fill and pour and close and open to their hearts delight. Some items that I have found that young toddlers enjoy placing in the containers are clothes pins, large hair bows, measuring spoons, and plastic spoons. Any item that is not a choking hazard works well and really can absorb a child for long periods of time.

Borrow:

We've all probably heard the idea of separating out your children's toys and putting some away, so that when you pull them out later, it is as though they have these new toys they have never seen. You can also implement this idea outside of the home!
Chances are you have a handful of friends who have children around the same age as yours. And chances are they have a handy supply of toys, bag activities, and books that they currently use in their homes. If they happen to mention how their child just seems bored with the toys they have currently, then why not ask if they would be interested in a Swap. If each family filled a tote with toys, books, and bag activities (along with a detailed list of what's inside the tote, family name, etc.) and if you had 3-5 families involved, you could host a Swap weekly, bi-weekly, or monthly and your child would have new toys and activities at the ready. Of course there is always a risk that items could get lost or damaged, so be sure to only put those objects in that you or your child don't have emotional attachments to.

If you have a local homeschool support group, try sending out an email asking others if they are interested in such an idea.


Invest:

Investing in good toys, educational supplies, and books is instrumental in rounding out your supply. But be wise in your investments. Sure, those electronic toys hold their attention and bring a smile to their face. And some are worth the price. But, electronic toys don't last. They need batteries. They are noisy and, when brought into the schooling area, can cause disruptions. Paper and plastic toys and supplies are wonderfully inexpensive, but these also don't last.

I have a supply of 5-10 sturdy wooden toys, 5-10 wooden puzzles, and wooden blocks of varying size and shapes. These have lasted through all four of my children and show little to no signs of wear. I divide them up and put half up on a high shelf, so that I can switch out the supply as needed.

Check used books stores and used curriculum fairs for sturdy board books. Plastic bathtub books will also take a large amount of abuse and are drool proof when you have them on hand for teething 6-8 month olds.

The biggest investment we make each year is on our school books. This is also playing a huge role in my "Prepare" segment because the choices you make in curriculum could have the most impact on how well you survive homeschooing with littles.
When my third child was born, I was teaching my two oldest, then in 2nd grade and kindergarten. I thought I could handle a full regiment of academically challenging (yes I realize they were little, but I was a little over-ambitious at that time) school subjects. Halfway through the year I thought I was going to throw every school book I purchased out the window. I over-curriculumed myself. I had to take care of nursing and holding a 12 hour a day crying baby. I couldn't keep up and it took a toll on all of us.

If I was handing out advice, the one that I would stress above all others would be to invest in the minimum (both academically challenging and how many subjects to implement) of what you think you will need. Don't buy that full year, 5 day a week, Science curriculum, with weekly experiments...blah blah blah....yes, that one. Invest in two easy to implement Science unit studies. My next school year, when my third was a one year old, I purchased two easy unit studies, one on botany and one on anatomy (for k-3rd grade). I thought I would have one done in 6 weeks to 3 months depending on my ambition, and the same with the other unit study, with ample time at the end of the year to make up for days missed or to just take it easy. Turned out it took me 6 months to do just one! Yikes. Thankfully it was in my plan and it worked. I didn't over-curriculum myself.

By the time #4 came along, sweet Harry, I knew my limits and I knew where I could push it. My oldest could handle a bit more academically challenging subjects, but I chose to limit that to subjects that she could do on her own and would not require me to invest time away from baby and *ahem* intense toddler. She did challenging Bible studies and way above age-level Reading requirements, but stayed easy on Math, Grammar, History, and Science.

Also, don't invest in expensive co-ops that require a lot of your time and that you know will require extra homework. Save soccer, softball, basketball, and the like for another year. Over-committing yourself can affect your homeschool environment. Your littles won't be littles forever, and it will be easier another year to add in your extra-curricular activities. For now, be content with the minimum. Know your boundaries. Organize playdates or small unit study based co-ops with others to get your socializing in.


That was it! This post was a doozy! Thanks for hangin' in till the end!


For the next post, I will discuss how to organize your supplies and schedule. Why go through all that work preparing and not know where anything is or how best to schedule it all in to your busy day?!

Thursday, May 19, 2011

Homeschooling with Littles About


I write this for me. Because I don't know how I survive some days. And, when asked, "How do you homeschool with a baby and toddler under-foot?", the only answer I can give is, "I just DO. I don't know how....it just happens."
I write this for my children, for if they ever choose to homeschool their own brood, I might get asked this question again, and I want a REAL ANSWER to give them. And goodness knows my memory is to shot now, I can't imagine what I will remember when I am 50.
I write this for you. If you struggle with homeschooling your older children and keeping your smaller children occupied, then I hope you can find something useful to utilize in your home. Or, if you don't struggle at all, but have grown tired of the plan you have now, you might be able to find something here, too!

This is a synopsis of what I hope to cover over the next few posts. I plan to cover a lot of ground, so grab a notebook (or turn your printer on) and keep up!!

1. Prepare: make, borrow, invest in all the tools you'll need
2. Organize: a place for everything, and planning your day
3. Enlist: don't be afraid to ask for help
4. Accept: when nothing works, breathe and move on
5. Enjoy: don't forget to enjoy them while they are little

I also hope that these posts might generate some feedback. So, for my 3 actual readers, chip in any tips you find relevant to a post as you read along.

Also, because I get sidetracked often and need breaks from self-mandates, be looking for a craft post (recycled wool sweater diaper cover!), and a happy birthday post for my (gasp!) 10 year old daughter. And food...you know THAT has to happen.

Oh, the calamity!

Thursday, May 12, 2011

Cornbread Breakfast

I recently realized that I had abandoned all other subcatagories on this blog and have, for the most part, just taken pictures of food. So, next week, expect a big installment titled: Managing a Homeschool Environment with Littles About. It is sure to be exciting! Well, not really. But you should come away with some good tips and tricks of the trade that I have observed and utilized over the past 6 years.

I leave you now with one final foodie blog before I am swept under, into the abyss of screaming babies and whiny toddlers, bloggin' that is.

This is, hands down, #2 (here are some others: #1, #3, #4,) in my top favorite breakfast meals list (yes, I have food lists). Leftover cornbread, in our house, is put either in stuffing or eaten by itself with a glass of milk for snack time. But, when I can, and don't mind the extra calories in the morning, I will indulge in this simple and satisfying meal.

Toasty Cornbread topped with Cheese, Fried Egg, and Tomato

1 piece leftover cornbread (we prefer the sweet johnnycake style in our house, but any ole southern white cornbread would do marvelously)
1 slice sharp cheddar cheese
1 egg (or two, if you're naughty)
1 slice tomato

Place the cornbread on an oven safe plate and top with slice of cheddar cheese. Put it in the oven (400 degrees) or toaster oven (medium toast) and let the bread get all toasty and the cheese melts, about 3-4 minutes. While the cornbread is in the oven, heat up a skillet and cook your egg how you like it. Perfection, to me, is an egg over-easy....but do as you wish. Once the cornbread and egg are done, place the egg over the cornbread and top with your slice of tomato.
Eat.

You could get a little fancy and put some fresh basil or crumbled bacon over the top. Maybe a splash of hot sauce. But for me, I keep it simple.
And when my fork pierces the yolk, and all the runny goodness seeps into the nooks and crannies of the cornbread...oh, heaven.

Monday, May 9, 2011

As the World Turns

Life has been so dull around here, what with homeschooling, co-op planning and current co-op year finishing, oldest daughter birthday planning, weekend retreat camp, tornadoes, yard sales, spring cleaning, mother's day weekend extravaganzas, kitten care, field trips, play dates...
So dull, in fact, that I have been able to laze around and take pictures of little else but kittens. Oh my...so dern cute.
This one is Jenny. Who was referred to as Jimmy until one week ago. Somehow I think I kept looking at the same gray kitten twice and never noticed that this one was a girl!
I plan on more homeschool style posts in the weeks to come...and maybe a few delicious food posts to appease my food readers.
Peace and Blessings!

Tuesday, April 19, 2011

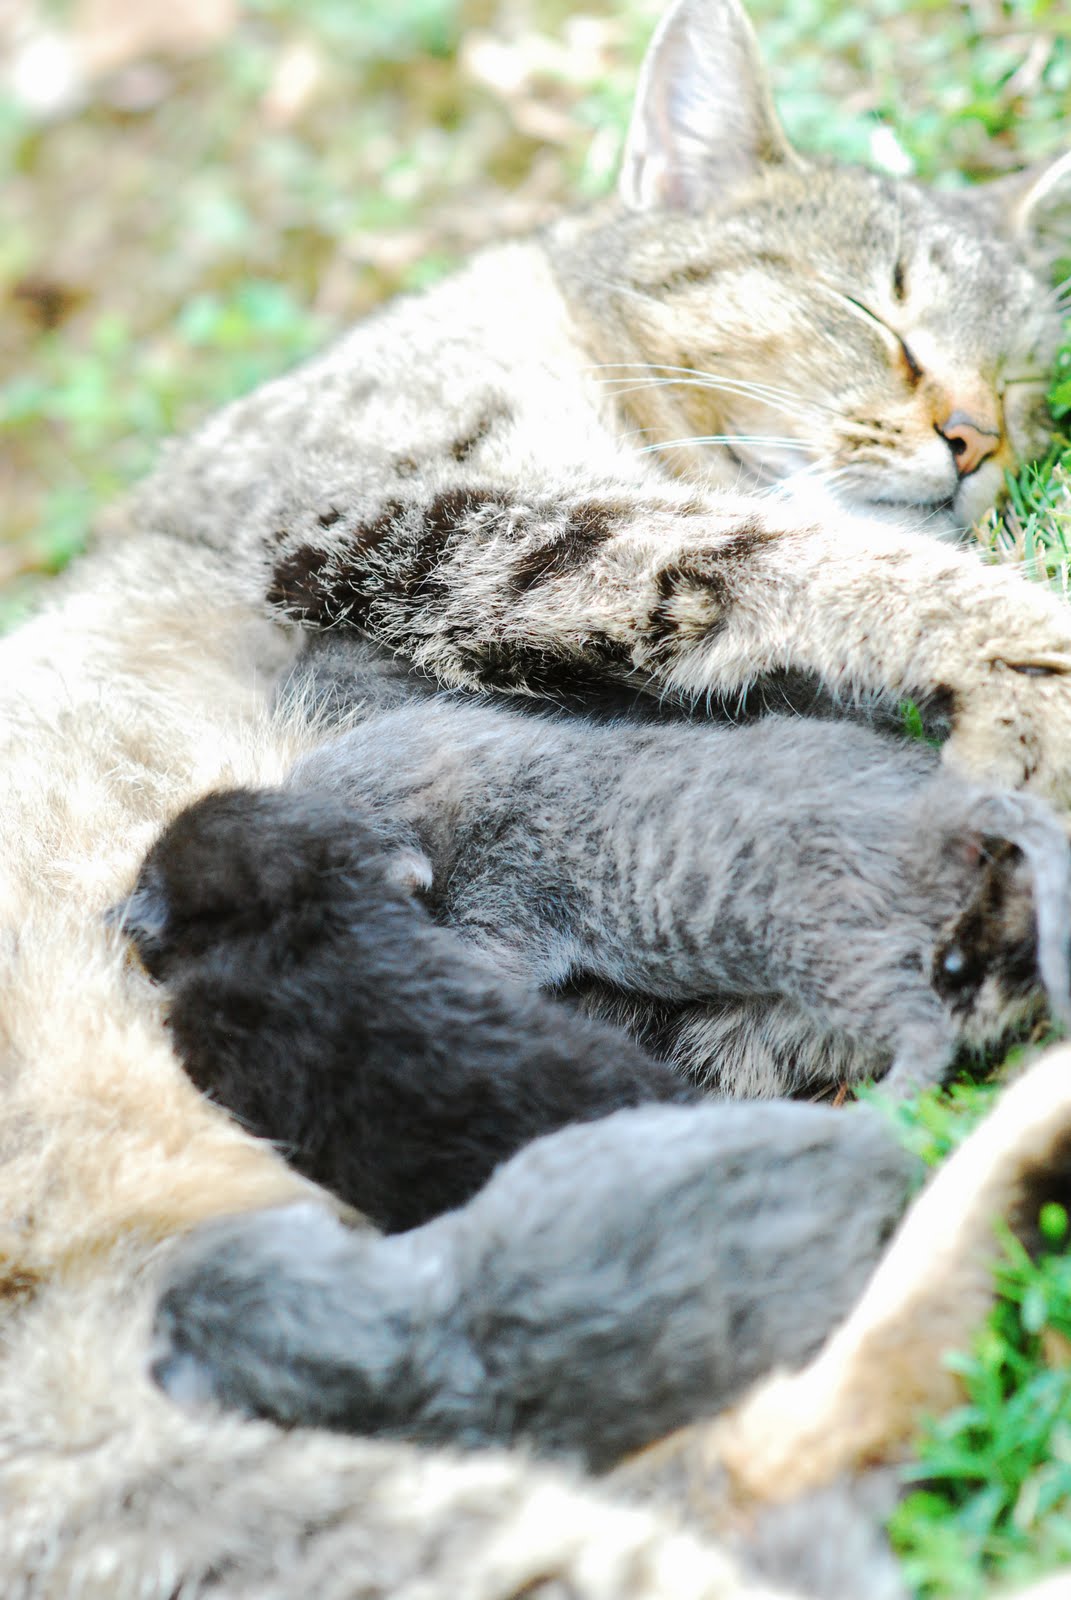
Gabby has her kittens

We have 3 gray tabbies and 1 charcoal tabby. Mommy did splendidly. Although I suspect the names will change daily (perhaps minute by minute), for now they are called: Jimmy, Buddy, Sissy, and Cosmo.
We watched the last one, Cosmo, being born. It was a beautiful thing. Gabby moaned faintly and his siblings mewed the little guy into being.
The children all watched. It was most distracting to complete our Spelling, but worked out well that our day turned into an impromptu biology lesson. There is no covering up all the nasty bits, like Gabby eating the afterbirth and chewing off the umbilicals. But also, what a beautiful exhibition of Gods design and creation.
I consider this a school day well spent.

Oh, and...who wants a kitten?!?!?!

Saturday, April 16, 2011

The Best Oven French Toast

And I aint lyin...

This dish is SO worth the extra time in the morning, and far better than plain ole toast and eggs.
It has this caremlized crunchy crust over the top, reminiscent of monkey bread. Swoon.

Oven French Toast with Buttery Nut Topping

1 loaf french bread, thickly sliced (about 15 slices)
6-8 eggs
1/2 cup milk
1/2 cup half and half
1 1/2 tsp vanilla extract
1 tsp ground cinnamon

For the Topping
1 stick butter, melted
1/2 cup brown sugar
1 cup half and half
1 cup sweetened and roasted pecan or walnut pieces

Let the bread slices dry on the counter overnight, or for at least 6 hours. In the morning, about 1 hour before you want to serve the dish, beat the eggs and then add all the ingredients through the cinnamon. Mix well. Grease a large baking dish (I used a large roasting pan or you can use two rectangular pans) and place the bread on the bottom, slightly overlapping. Pour egg mixture over top and let sit on the counter for at least 30 minutes, being sure that all pieces are covered with the mixture. Flip bread about 15 minutes through to make sure all sides are soaking up the egg mixture. Preheat your oven to 350.
Meanwhile, make the topping by mixing the butter, brown sugar, half and half and nut pieces in a small bowl. Right before baking, drizzle the topping over the top of all the bread slices and use a spatula to spread it out gently so you have bits of nuts over each slice.

The drizzle oozes happily over the bread.

Bake for about 30 minutes or until all your edges are a beautiful golden brown.

Its a masterpiece for the taste buds.

Serve with warmed syrup and a puff of powdered sugar. Some fresh bananas and strawberries and maybe some spicy breakfast sausage wouldn't mind being alongside, either.

Oops...sorry. You have a bit of drool...

Friday, April 15, 2011

Oh, *that* ham? YES, please, and thank you!

I purchased this book a few weeks back and have been absolutely devouring it. Although I would not consider our family of 6 a “large” family, the ideas and methods mentioned within can be utilized no matter the size of your household.
I knew nothing of the author, aside from reading the reviews of her book in a few homeschool catalogs I receive. I also did not know that she had a blog! Score!!! She has included lots of recipes, and she follows almost the exact guidelines that I have for my own menu planning. She cooks a lot out of her slow cooker. I think I love her.
In reading this recipe post, The Ham that Jumped into my Shopping Cart, I was instantly motivated to remove the large 9.4 pound ham that had been idling away in my big freezer. And I put this recipe out for you guys (all three of you) just in time for Easter ham season. But, I have to warn you, this ham did not make me think of bouncing bunnies and prismatic eggs. Nope. It reminded me of Christmas. Good thing I LIKE Christmas. And, yes, as the author states, “Your stomach will growl all day”. This is factual.
I am copying her recipe exactly, with the exception of one typo (which she later corrects in her comments), the orange zest that I substituted for the orange powder she has listed, and my own personal addition of honey because I just L-O-V-E a good honey ham. Feel free to omit the honey if you aren’t feeling as sweet and sassy as myself. I also stuffed the little spent orange carcasses in with the ham for good measure, which you can do, or not do. What-evs.

The Crock-Pot Ham from Kim Brenneman

1 (7.5) pound bone-in ham
6 cups apple cider
2 tablespoons ground cinnamon
2 tablespoons ground cloves
1 tablespoon ground ginger
4 small or 2 regular sized oranges, zested and juiced
1/3 cup honey

1. Place the ham in the slow cooker.
2. Pour in the apple cider.
3. Add the spices and stir into the apple cider a bit.
4. Put the lid on and turn the slow cooker to low.
5. Cook for 8-10 hours.
(see the disintegrated remains of those oranges? now *that's* good flavor)

(ham for DAYS!)

I took a couple of cups of the cooking liquid leftover and reduced it in a saucepan for half an hour. Then I cooked up some egg noodles, scooped up some of the meat, and drizzled the sauce reduction over all to make a quick pasta dish. Served with sliced cucumbers that were sprinkled with sugar, red wine vinegar, and a hint of dried thyme.


*cooks notes:
My ham was a hefty 9.4 monstrosity and didn’t entirely fit into my slow cooker. So, I had to lop off a side and wedge him in there. It worked, but left a bit of him uncovered, so I basted the tippy-top a few times during the cooking period. I also had to ladle out a bit of the liquid half-way through cooking as it was threatening to spill over.
Also, if you prefer your ham “sliced and sturdy”, lessen the cooking time. I cooked mine exactly 8 hours and the meat fell off the bone and pretty much shredded on contact…this was FINE with me, but you may not want yours to shred as such.

Tuesday, April 12, 2011

Stuffed Chicken Breasts with Dijon Glaze


A top favorite in our house! I make my own stuffing and have included a very simple no-precook recipe for stuffing, but feel free to use your favorite stuffing recipe or the boxed variety. I use a leftover assortment of bread that is on the cusp of molding in my pantry. This go around it was 2 pieces of cornbread, 3 small yeast rolls, and four wheat dollar rolls.

Stuffed Chicken Breasts with Dijon Glaze

4 cups bread cubes, about 1/2 inch pieces
2 tsp dried onion
1 tsp dried garlic
1/2 tsp sage
1/4 tsp celery salt or regular salt
1 cup broth (or more)
1 tbs butter, melted

For the Dijon Glaze
1/2 cup dijon mustard
2 tsp honey
1 tsp dried thyme

6 boneless, skinless chicken breasts

To make the stuffing, leave out the bread cubes on a dry surface (avoid placing them on a towel, as they will hold onto moisture) for a day and a night to let them dry out. If you are pressed for time, you can toast the cubes in the oven until just crunchy but not browned and skip the overnight/all day step.
Preheat oven to 400. Place cubes in a mixing bowl and add the dried onion through the butter. Mix well. Your stuffing should be very moist and almost soggy, add more broth if you need it.
Take each chicken breast and make a pocket opening along one side but not all the way through (imagine a pita pocket). Stuff each breast to overfilling with the mixture and place in a large greased baking dish. Give each breast a light pinch of salt and pepper. Dump any leftover stuffing in between the breasts.


Once you have all the breasts stuffed, make the dijon glaze by mixing the dijon, honey, and thyme in a small bowl. Drizzle the glaze over each breast, but don't rub it in.
Cover and bake 45 minutes or until meat thermometer reads 165 degrees in the thickest part of the meat.
We ate ours with steamed broccoli with a homemade cheese sauce and some applesauce with cinnamon.

*feel oven lazy? this recipe works WONDERFULLY in the crock-pot. make just as directed above, except assemble the breasts mid morning and let cook on low heat in the crock-pot until dinner time.

*You can also use boneless, skinless chicken thighs or pork chops!

Monday, April 11, 2011

It's Called "Junk"


And, yes. It's delicious.

I didn't name it. I definitely didn't make it up. But, it is a staple at our table none the less.
What is "Junk"? Well, it is one of the most versatile dishes; and simple, and satisfying, and my children....they adore it. So there! Kudos to fellow homeschooling pal, Crystal for cluing me in.

The principle is this: you build on a theme; cubed potatoes on bottom, a meat on top, dump in all the other elements that fit your theme, cheese it, bake it, eat it.
Usually the best "Junks" have been a mish-mosh of leftovers. Like the one time our "Junk" was cubed yukon potatoes, chorizo and leftover taco meat, olives, raita, queso fresco, and half of a stuffed poblano pepper from our local Mexican eatery. It was heaven. And I mean H-E-A-V-E-N.

The most common and base recipe is as follows:

Junk (and no, you are not allowed to change the name)

2- 3 medium potatoes, peeled (or not, if you like that), and cubed into 1/2 inch pieces
1-2 pounds ground meat, cooked and seasoned with salt and pepper (or anything leftover hanging out in your fridge)
1 can tomato sauce or 1 1/2 cups ketchup (that's right, KETCHUP! no shame...)
1 tomato, chopped or 1 can tomatoes, drained and chopped, if needed
sprinkle of seasoning (like taco or Italian)
1 cup shredded cheddar

Grease a 9x9 inch dish. Place potatoes on bottom (a sprinkle of salt on top wouldn't hurt), and layer first the meat, then the sauce, tomatoes, seasoning, and cover with cheese. Cover and bake at 350 for about 40 minutes or until potatoes are tender when you poke around hungrily with a fork.

This is a typical lunch or dinner in a pinch for our family. Other themes that we have made that work well are: BBQ Chicken Junk (cubed potatoes, shredded chicken, bbq sauce, sour cream, chives, and cheddar...it's like a loaded potato!), Greek Junk (mashed potatoes, ground meat with a pinch of cinnamon and oregano, tomato sauce, olives, onions, artichoke hearts, and feta), Pizza Junk (cubed potatoes, pepperoni and pork sausage, pizza sauce, mushrooms, mozzarella, parmesan).

Yet to try but plan on next week: Hawaiian Fajita Junk (chicken, bell peppers, onions, pineapples...oh....my)

Really...if you can think of a theme, you can pull this off. And it is so homely and divine in the same mouthful.

There is no shame in simple. And surely no shame in utilizing what your fridge seems to accumulate in a week.

So, eat well (and less stressed)!

Friday, April 8, 2011

A confession

That's right.

I confess my failing, to the whole blogger kingdom. My New Year's Resolution to eat raw food twice a week...never actually happened.

I lasted all of one week.

So, there you have it. Such is This...is not perfect. I am far far from it. I make a goal and fail sometimes (miserably as seen here).

I could gripe about how it was sooooo hard and that I didn't have the time. But, really, I lost my motivation. I over committed myself. Maybe a better goal, like once a month raw lunchtime or some such thing. Who knows.

Oh, and I ran...once, with my friend Bethany. Once.
I did get up early ever day, though, and did really well...until the dreaded Spring time change. Now we do good if we start school by 10am.

OK. Le Sigh.


Yummy recipes next week (with pictures OF COURSE!) to make it up to you.

xoxoxoxo

Monday, March 28, 2011

Hamburger Steaks with Spicy Sweet Tomato Sauce, Caramelized Onions, Mushrooms, and Cheddar

I made hamburger steaks for my family last week for the very first time. You'd think I had invented the tastiest food ever made. They LOVED it and have asked for it again this week. I fancied them up a bit this time around, though.


Hamburger Steaks with Spicy Sweet Tomato Sauce, Cheddar, Caramelized Onions, and Mushrooms

1 tbs butter
1 red onion, sliced
1 cup sliced mushrooms
1 15 oz can stewed tomatoes
1 small chipotle chili pepper
1/2 cup prepared bbq sauce
1 small peach, sliced, skin and pit removed
pinch salt
4 lbs ground meat (i used a combo of ground turkey and ground beef)
3 tbs Worcestershire sauce
salt and pepper
sharp cheddar cheese, sliced


Start the onions and mushrooms by melting the butter in a skillet over medium high heat. Add the onions and a pinch of salt and bring the heat down to medium. Let onions cook for about 30 minutes, stirring occasionally. Add the mushrooms and cook an additional 10 minutes. Your onions should be a beautiful golden brown.


While the onions cook, start the sauce by pureeing the tomatoes, chili pepper, bbq sauce, salt, and peach in a food processor until almost smooth. Pour into a small sauce pan and bring to an even simmer. Let simmer until dinner is almost ready, then remove from heat to let cool just before serving.

For the hamburger steaks, mix the ground meat, Worcestershire sauce, and desired amount of salt and pepper. Shape mixture into 8 oval shaped patties and cook on a griddle or skillet, medium high heat, 8 minutes on each side or until no pink juices remain (i do like my beef a little rarer, but since i used ground turkey, i did not want any visible pink). Before removing each patty from heat, spread a bit of the tomato sauce and top with a slice of cheddar and let melt.

To serve, plate each patty and scoop a generous helping of your caramelized onions and mushrooms on top of the melted cheddar. A simple salad and seasonal fruit are great compliments.

Friday, March 25, 2011

It's called "Reverse"

i created a tumblr.

daily dodd

*warning. it will be nothing like "Such is This". it will be like my facebook. which i do not have anymore.

what you can expect: something every day. sometimes twice (or thrice) a day. sometimes old pics, but mostly new pics, quips, and quotes from daily family life.

so quit pestering me already about missing me on facebook. you know who you are....

Monday, March 14, 2011

Lenten Lunch on a Monday


I gave up leavened bread for Lent. Yes...you heard me right. I, the sandwich lover, gave up all breads containing yeast, baking soda and powder. I also gave up coffee, but that is not pertinent in regards to this post (but you can emote sympathizing tongue clicks my way).

I did allow myself to browse the endless aisles of wheat goodies in search for convenience items made without leavening and was able to procure a few boxes of simple crackers. I splurged on some specialty cheeses and stocked up on meats (which I do not eat much of, but felt inclined to eat more of so my belly would feel full. that's not scientific, just what my brain came up with).

Today's lunch was quite satisfying. I purchased some Dubliner cheese (in honor of the forthcoming Irish holiday), boiled some chicken, and assembled a meager luncheon masterpiece.

I have included a chicken salad recipe that I used today, but my chicken salads vary from day to day and season to season. Feel free to experiment with other additions. A few of my other favorites are pecans and cranberries, curry and grapes, dill and lemon zest, or bacon and shredded carrot. You could also replace the tomatoes with sprouts or cucumber slices. If I were going completely wheat free, the Dubliner is such a sturdy cheese that it could stand in for the cracker and hold up under the salad and tomato.

Simple Chicken Salad on Crackers with Tomatoes and Dubliner Cheese

1 large boneless, skinless chicken breast, boiled and shredded (or 1 12oz can of good quality, organic chicken breast)
2 small stalks celery, minced
1 green onion, dark tops and root removed, thinly sliced
1 cup real mayonnaise (or more to taste, you can also use a light real mayo)
1 small sweet apple (such as gala or lady pink), chopped (keep the skin on)
salt and pepper to taste
3 or 4 thin slices of Dubliner Cheese (or another aged, sweet, hard cheese) Crackers (I used Carr's Table Water Crackers with Cracked Pepper)
2-3 slices of tomato, cut into fourths

Mix the first 6 ingredients together in a medium bowl to make the chicken salad. On each cracker place about a tablespoon of the chicken salad, then top with half of a cheese slice, and cap it with a tomato. Munch.
Served here with honeydew wedges.

Now it is almost 4 and I am fighting a hunger twinge. Perhaps I should divulge in my new favorite snack, Oikos Organic Greek Yogurt with Caramel. Yes, you can die happy eating this way.

LinkWithin

Blog Widget by LinkWithin